Preparing to execute instructions
Before starting the first step, make sure you have:
A project ready to upload;
Enabled Pixel Streaming plugin. How to install Pixel Streaming plugin;
Access to the Control Panel. Contact us to get access [1];
- To complete this guide, your working environment must meet all the requirements above. If you have not completed any of the points, follow the link to the appropriate instruction and complete it first.
Step 1. Create Project Archive
| Info |
|---|
Make sure you have the Pixel Streaming plugin enabled, and export your App for Windows. |
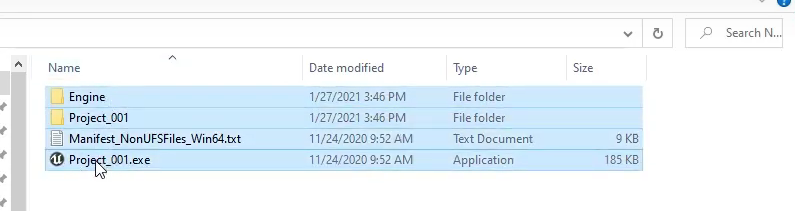
1.1 In the Root folder, that is, in the folder where the application executable file is located (file with the .exe extension), select all files and folders (image 1).
| Warning |
|---|
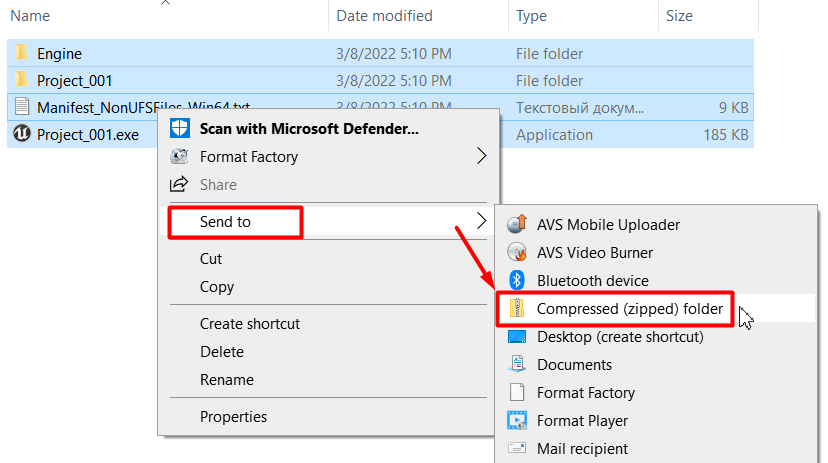
Please note, if you upload a project without archiving it first then the upload will fail (image 2). |

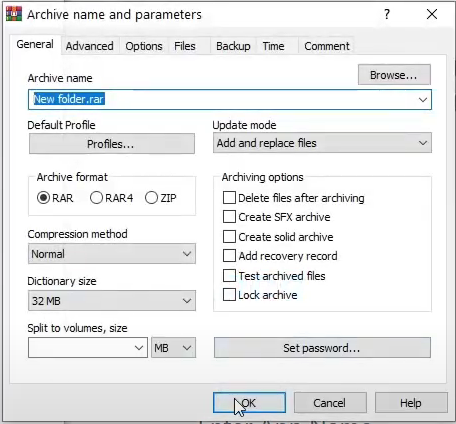
1.2 Right-click on the selected files to bring up the context menu. In the context menu, select "Send to"->” Compressed (zipped) folder”(image 3).
| Tip |
|---|
You can use any archive creation software. Supported archive formats: RAR, ZIP, 7z. |
| Info |
|---|
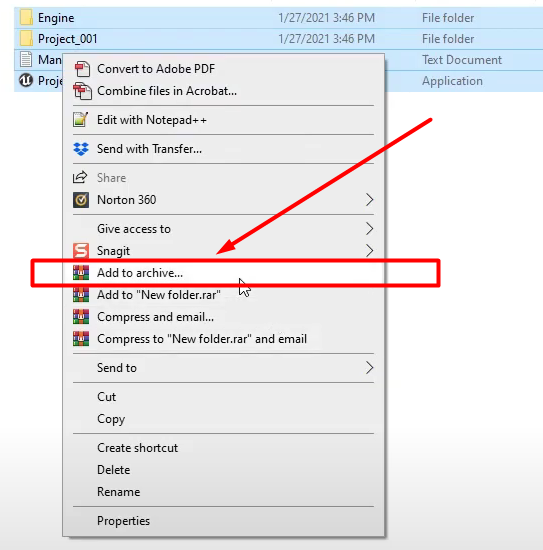
Here is an example of creating an archive in the WinRar application that Windows provides (image 4 and image 5). |
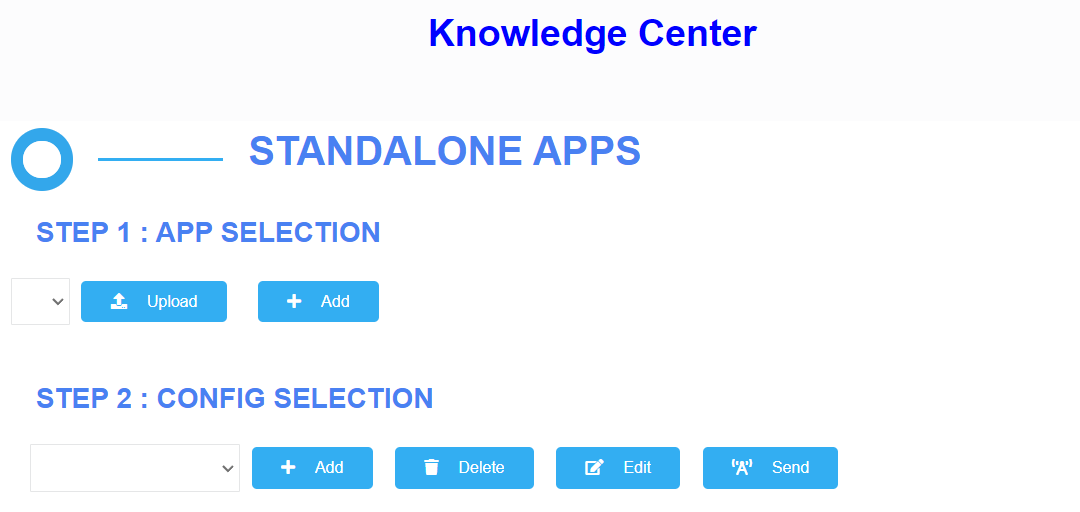
Step 2: Upload the Application
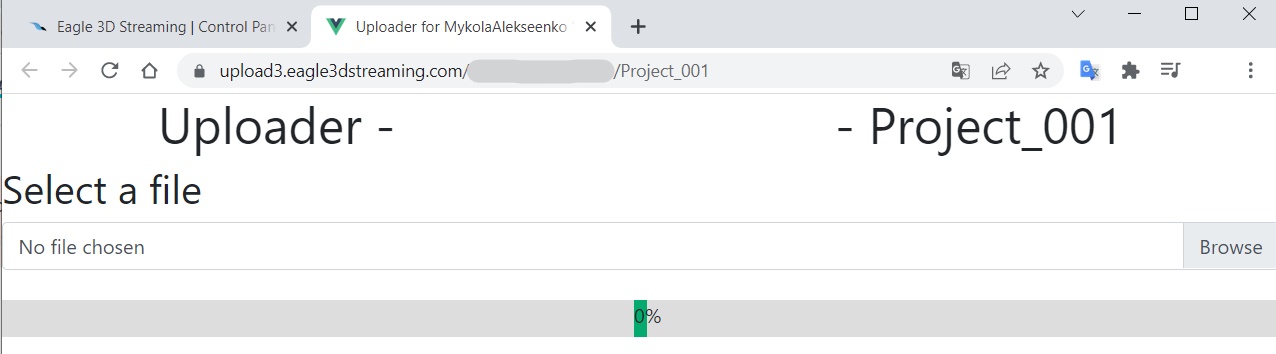
2.1 Go to the Control Panel by your URL (image 6).
| Info |
|---|
If you don't have access to the Control Panel, please contact our support team for a custom URL. Get Access. |
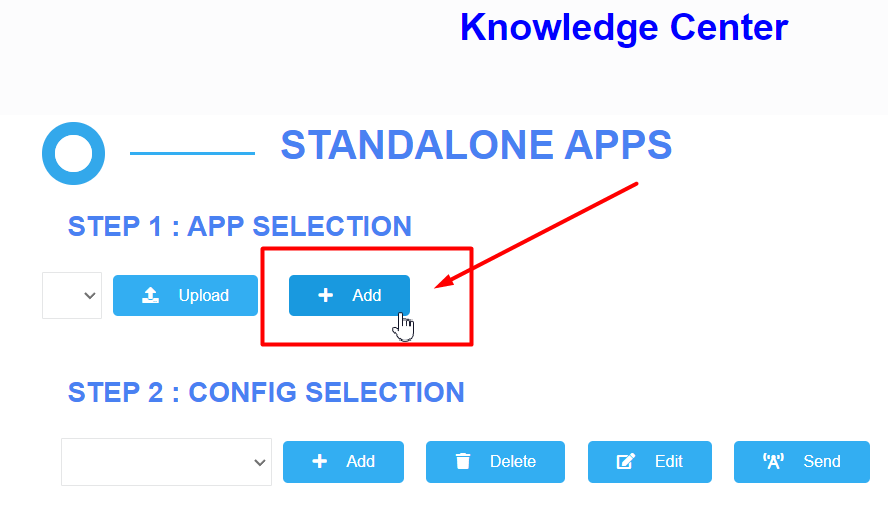
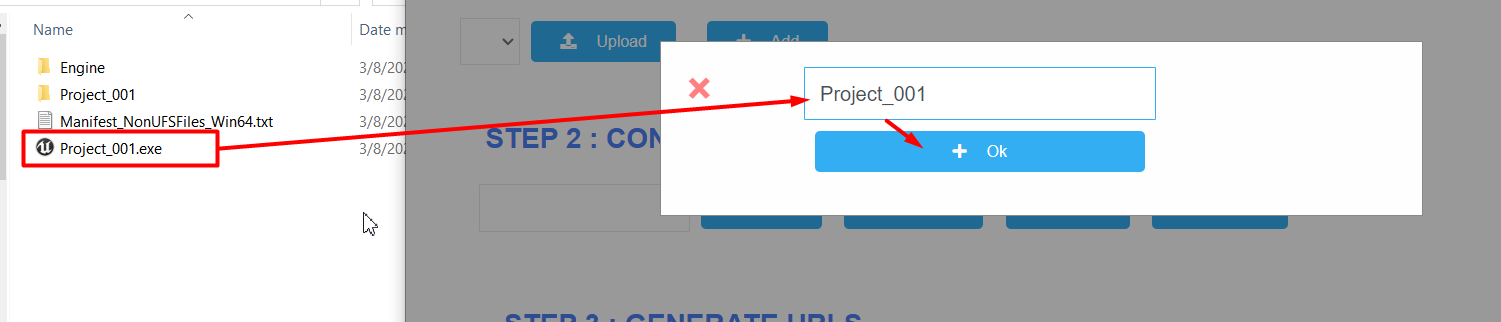
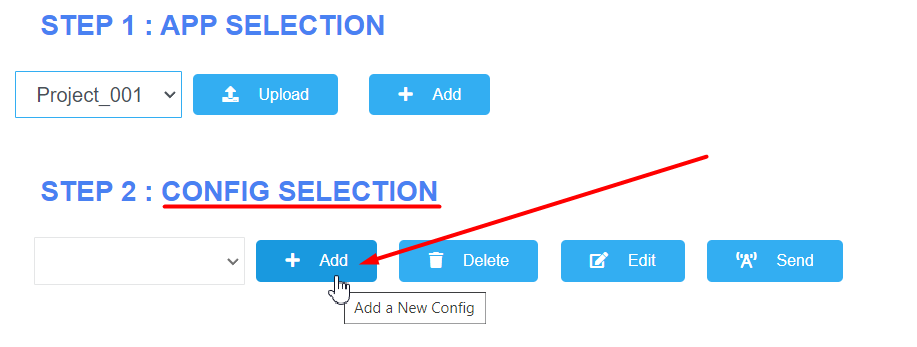
2.2 In the APP section, click the Add button (image 7), and enter the name of the application in the opened popup window, which exactly matches the executable file (.exe) inside the ready-to-upload archive, then click the Ok button (image 8).
| Warning |
|---|
Be sure to enter the name of the app before clicking ‘Upload New App’. Clicking ‘Upload New App’ before entering an app name will result in an error. |
2.3 Once you have verified that the application name is correct, click the Upload button. A new tab will open in your browser (image 9).
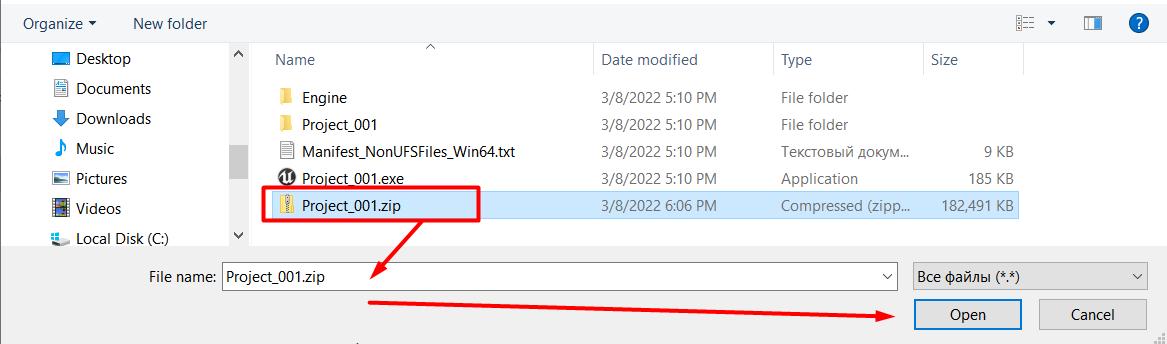
2.4 Click the Browse button, select the archive with the project in the opened window (image 10) and click the Open button.
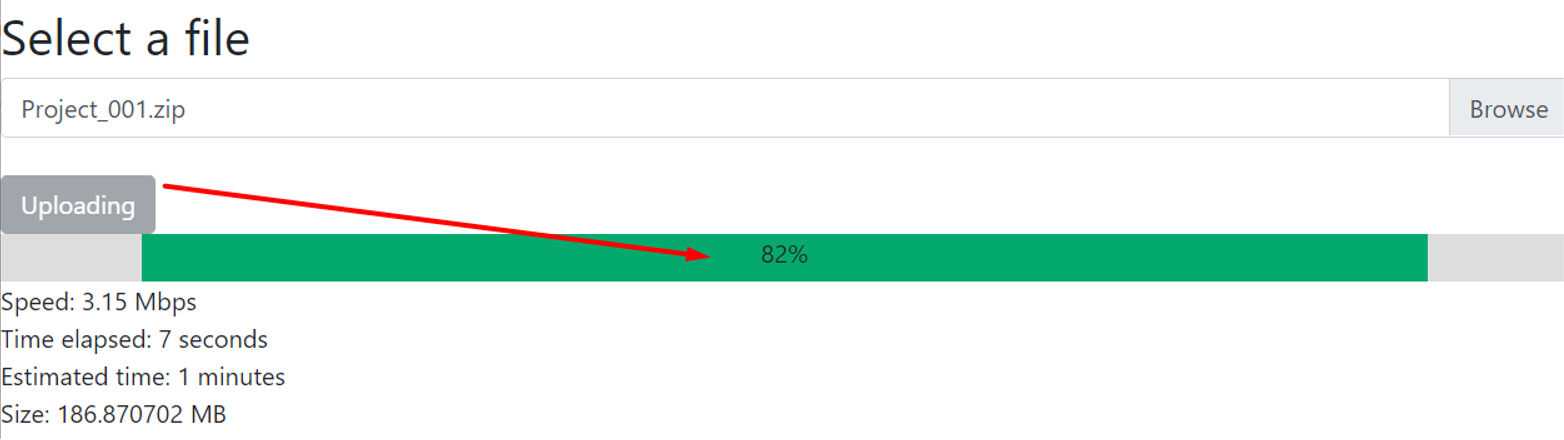
2.5 Click the Upload button and wait for the project to upload. In the progress bar, you will see the application uploading progress (image 11).
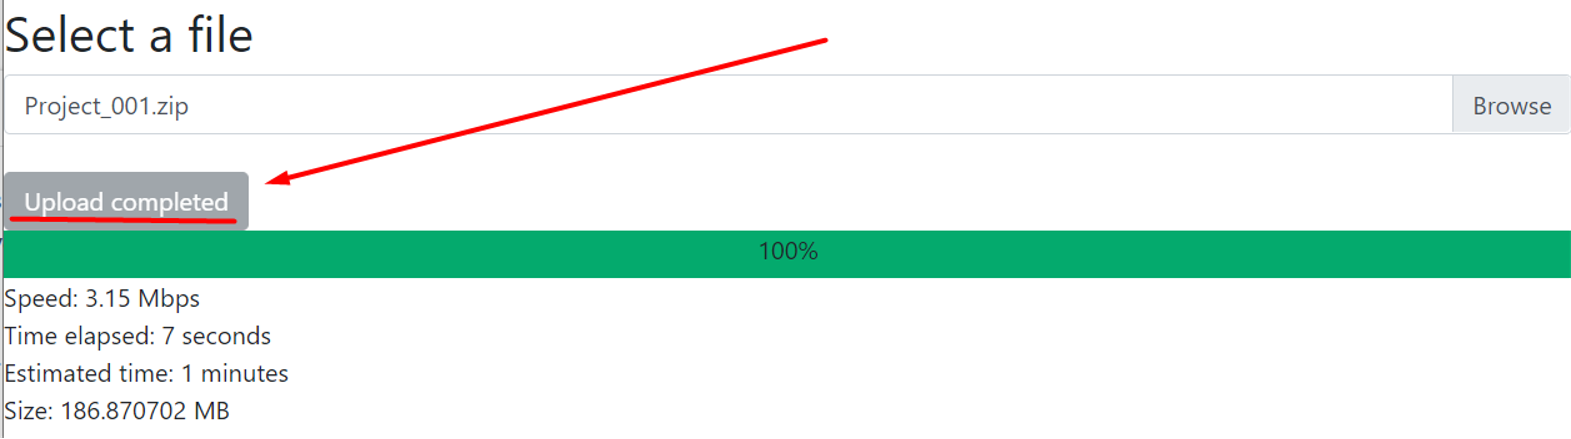
As soon as the project is uploaded to the server, you will see a message about the successful completion of the upload, in place of the Upload button (image 12).
Step 3. Create Config
| Info |
|---|
You don't have to create a new config for every new application. If you already have a Config that suits your new application just select it. |
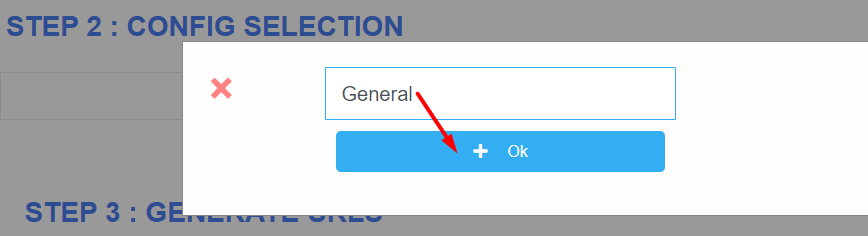
3.1 When the application is uploaded, go back to the Control Panel tab, and click the Add button in a CONFIG section (image 13). In the opened window enter any name for your new Config, then click the Ok button (image 14).
| Note |
|---|
Please note, spaces are not allowed in the config name. |
| Warning |
|---|
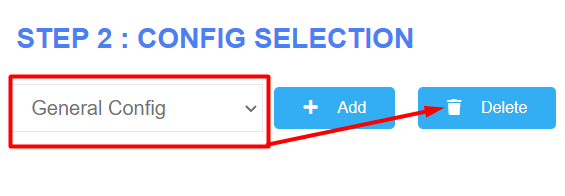
If invalid characters are entered in the name of your config, you will see an error when you try to run the application (image 15). Delete this config (image 16) and create a new one with the correct name. |

| Tip |
|---|
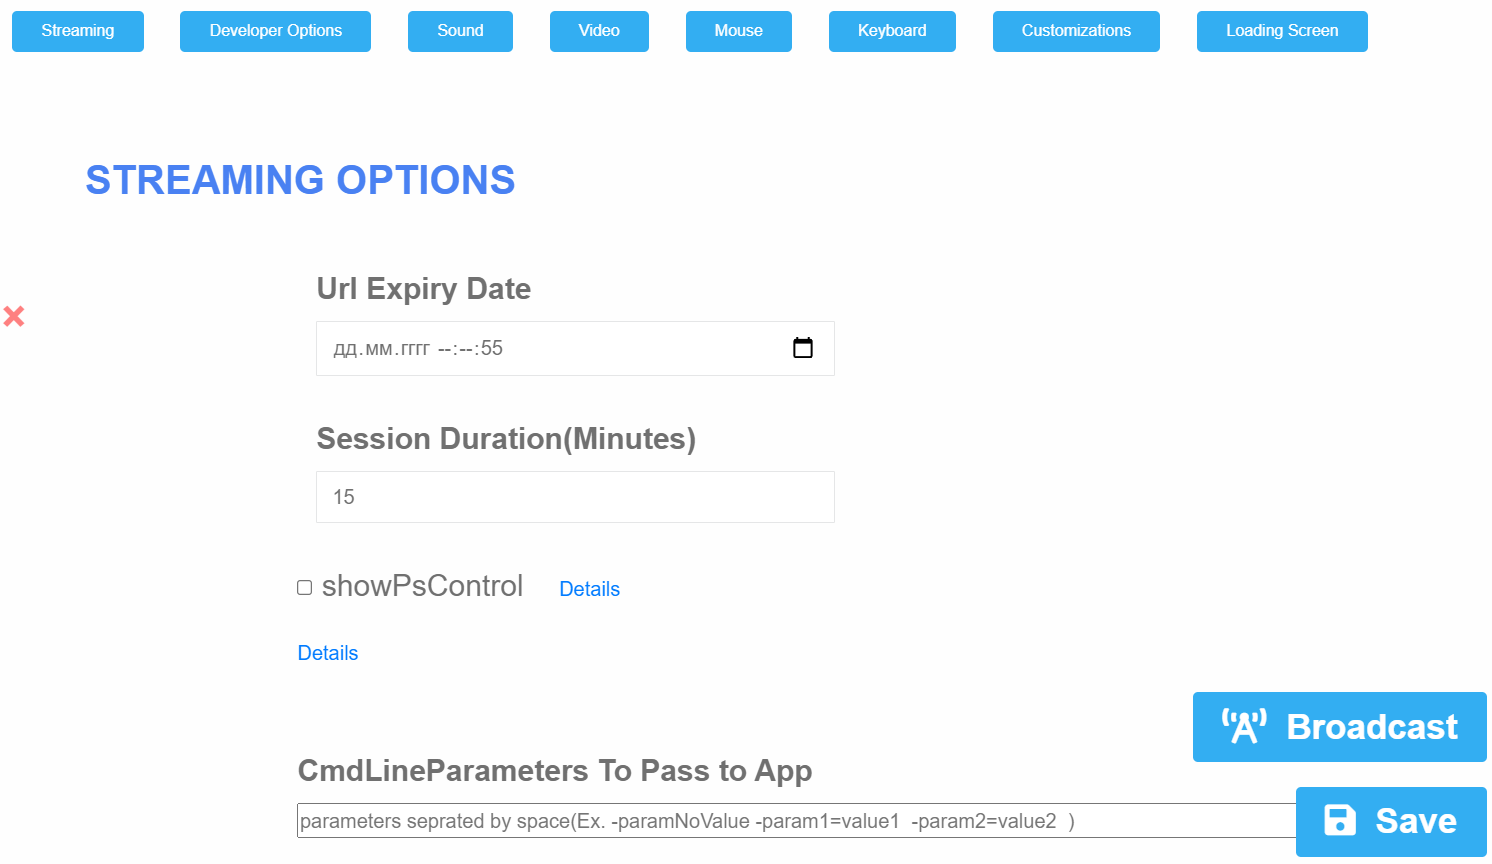
In the following tutorials, you will find a detailed description of all the features in the Application Config (image 17). |
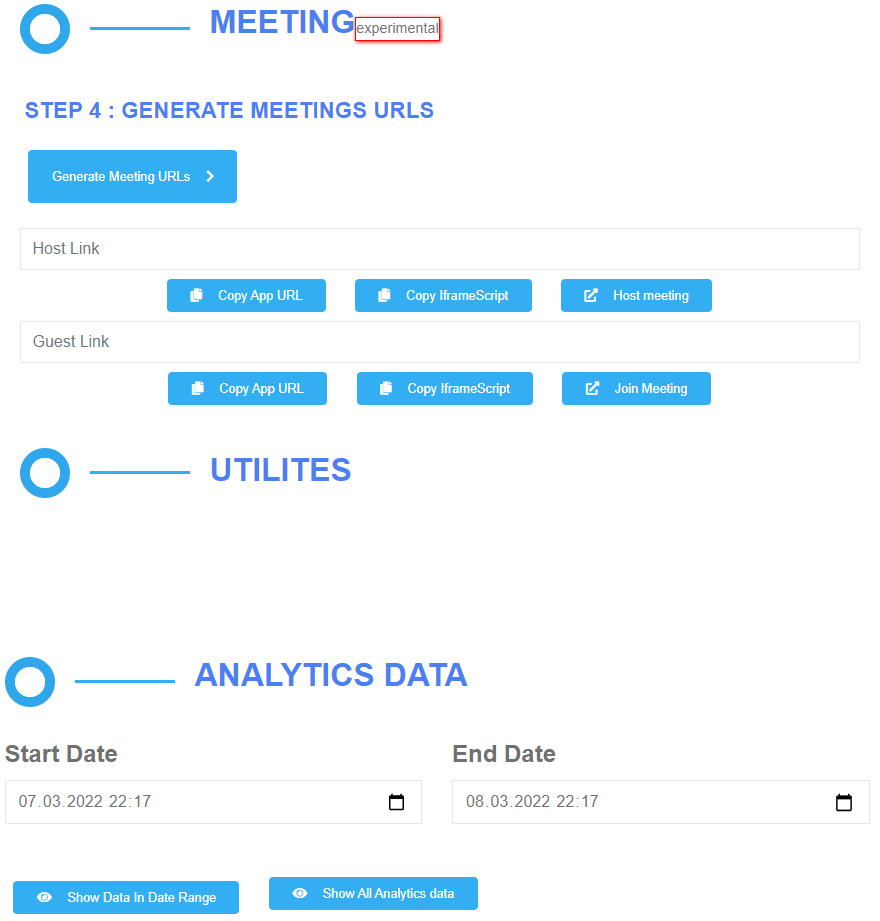
Step 4. Play Application
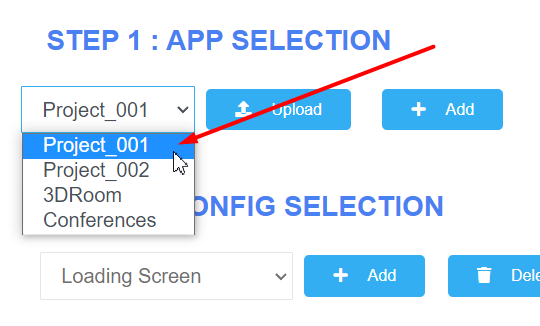
4.1 Select the application from the list of apps in the APP section to launch (image 18).
| Info |
|---|
If you don't see the application in the list, refresh the page and select the application in the list again. |
| Info |
|---|
To refresh the page, press F5 on your keyboard or use the corresponding button in your browser. |
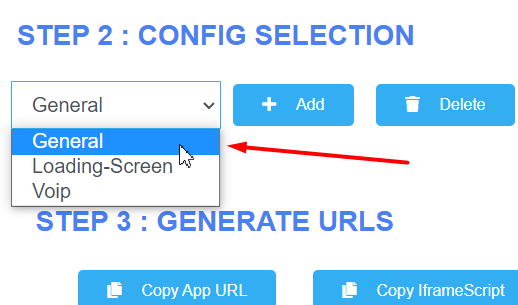
4.2 Select a config file from the list of configs in the CONFIG section for this app (image 19).
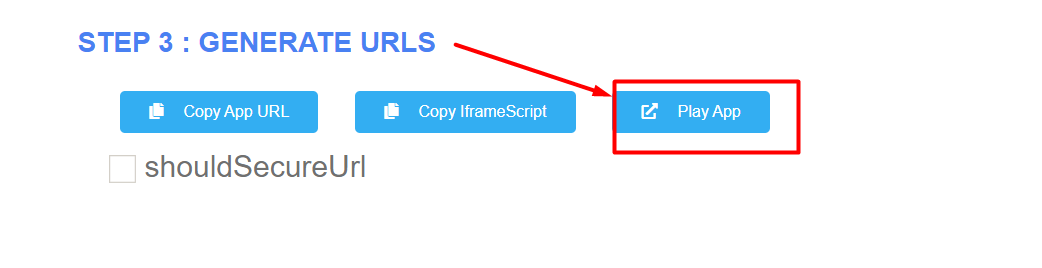
4.3 Click the Play App button in the GENERATE URLS section to start the game. The game will open in a new tab.
| Tip |
|---|
You can also Copy the App URL or iframeScript to embed or share on your site. |
| Tip |
|---|
In the following tutorials, you will find a detailed description of all the features in the Control Panel (image 21). |