This document explains how to Upload an Unreal Engine Application on Eagle 3D’s Platform.
Prepare to execute instructions
| Info |
|---|
Make sure you have:
|
- To complete this guide, your working environment must meet all the requirements above. If you have not completed any of the points, follow the link to the appropriate instruction and complete it first.
Instructions
| Panel | ||||||
|---|---|---|---|---|---|---|
| ||||||
Make sure you have enabled the Pixel Streaming plugin, and Packaged your Application for Windows before following the instructions. |
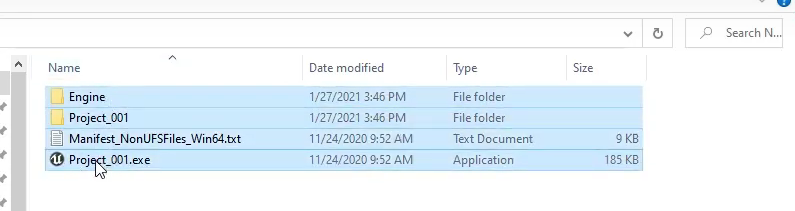
Step 1. Select all the files in your Root folder
In the Root folder, where the exe file of your Application is located, select all the files and folders.
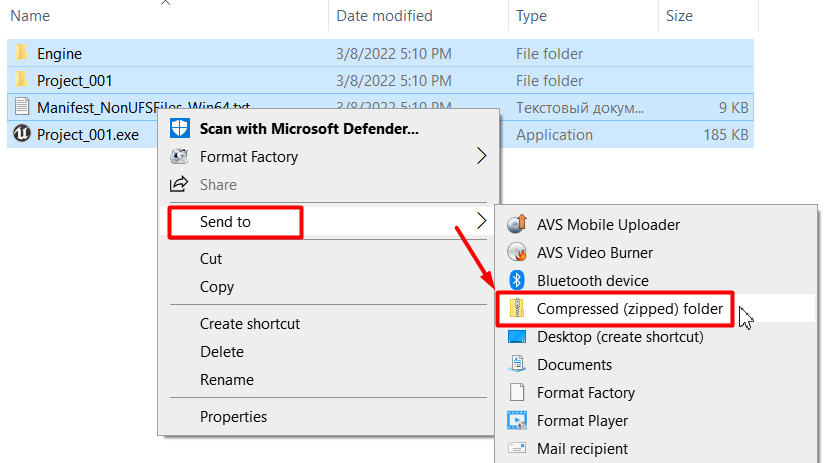
Step 2. Create an Archive of your Packaged Project’s Root folder
| Note |
|---|
Please note, if you upload a project without archiving it first, the upload will fail. The Supported archive format is ZIP. |
| Panel | ||||||
|---|---|---|---|---|---|---|
| ||||||
Use ZIP as your Archive format, right-click on the selected files →Send to → Compressed (zipped) folder |
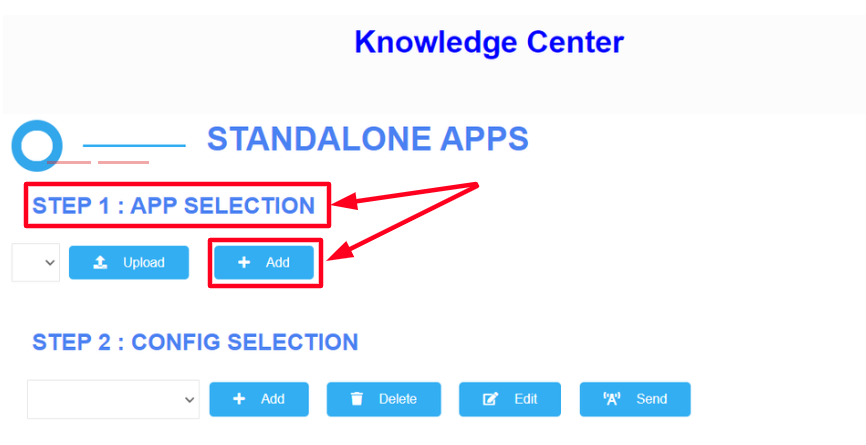
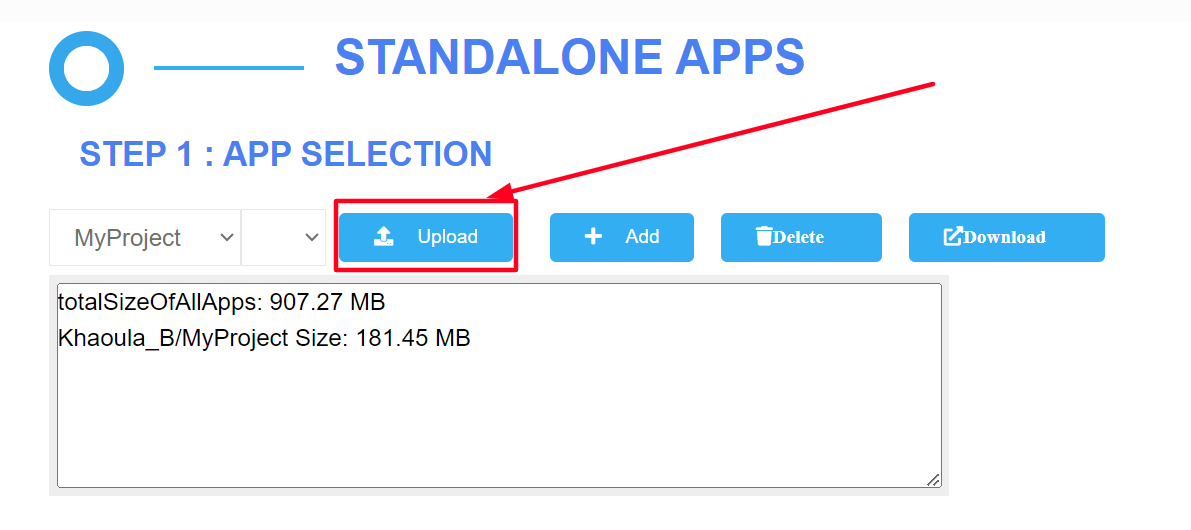
Step 3. Add the name of your App on your Control Panel
| Info |
|---|
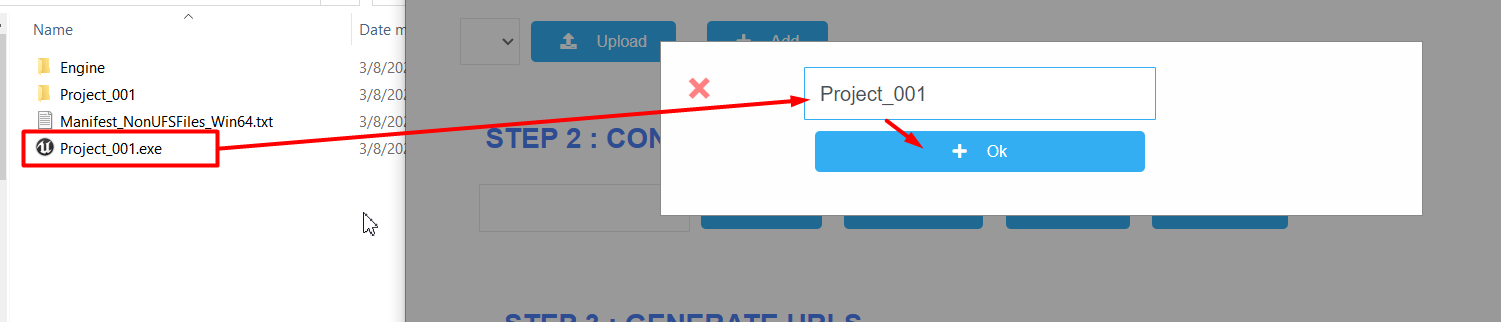
Open your Go to: Control Panel from here https://account.eagle3dstreaming.com/signin?uri=eyJjb250aW51ZVVybCI6Imh0dHBzOi8vY29udHJvbHBhbmVsLmVhZ2xlM2RzdHJlYW1pbmcuY29tL2F1dGg/Y3VybD1odHRwczovL2NvbnRyb2xwYW5lbC5lYWdsZTNkc3RyZWFtaW5nLmNvbSIsInRpbWVzdGFtcCI6MTcwMDQ5MTcwNDYyOH0=Go to → Step 1: App Selection → Add → enter the name of your App → click OK |
| Panel | ||||||
|---|---|---|---|---|---|---|
| ||||||
The Name of your App should exactly match the (.exe) file from your Root folder. If you input a different name from your exe file, your App will fail to start , and (it will get stuck on the loading phase (Starting App page)) |
| Panel | ||||||
|---|---|---|---|---|---|---|
| ||||||
The name of your App should not contain any dot as it might cause streaming issues. |
Step 4. Upload your App
1- Click Upload
A new tab of the Uploader page will open in your browser.
| Warning |
|---|
For the first version of your Application, make sure to enter the name of the app before clicking the ‘Upload’ button, if you don't, an error warning message will appear. |
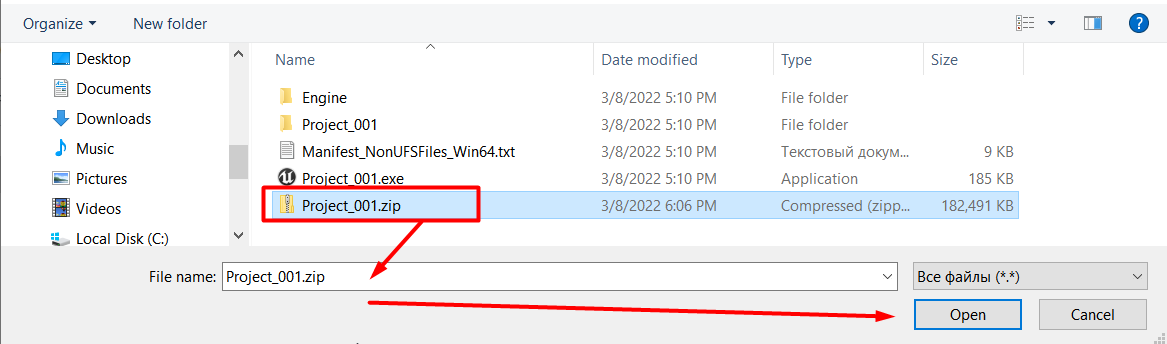
2- Click Browse → select the archived Project → Open
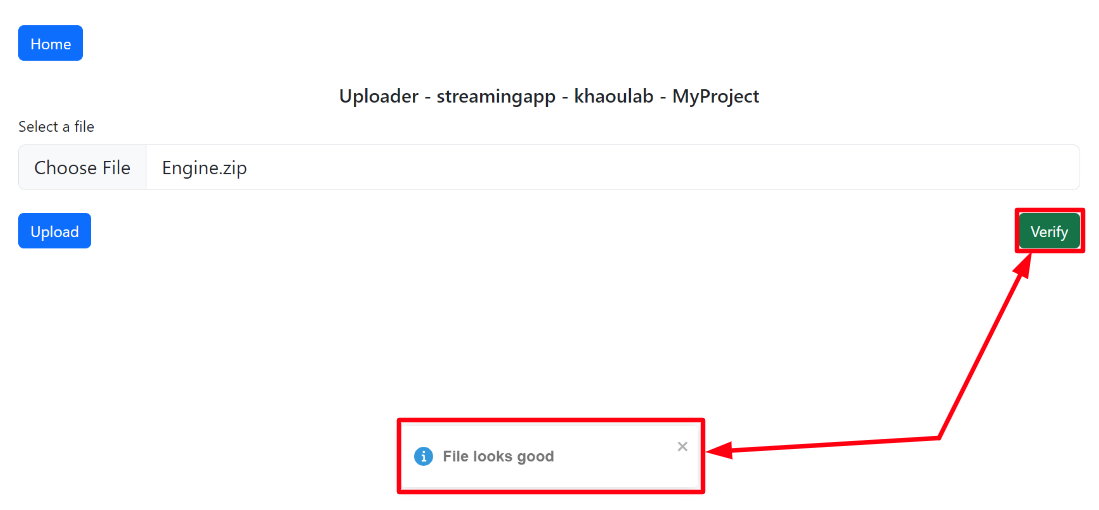
3- Click on ´Verify´ for a verification of the zip file
4- Click Upload. In the progress bar, you will see the application uploading progress
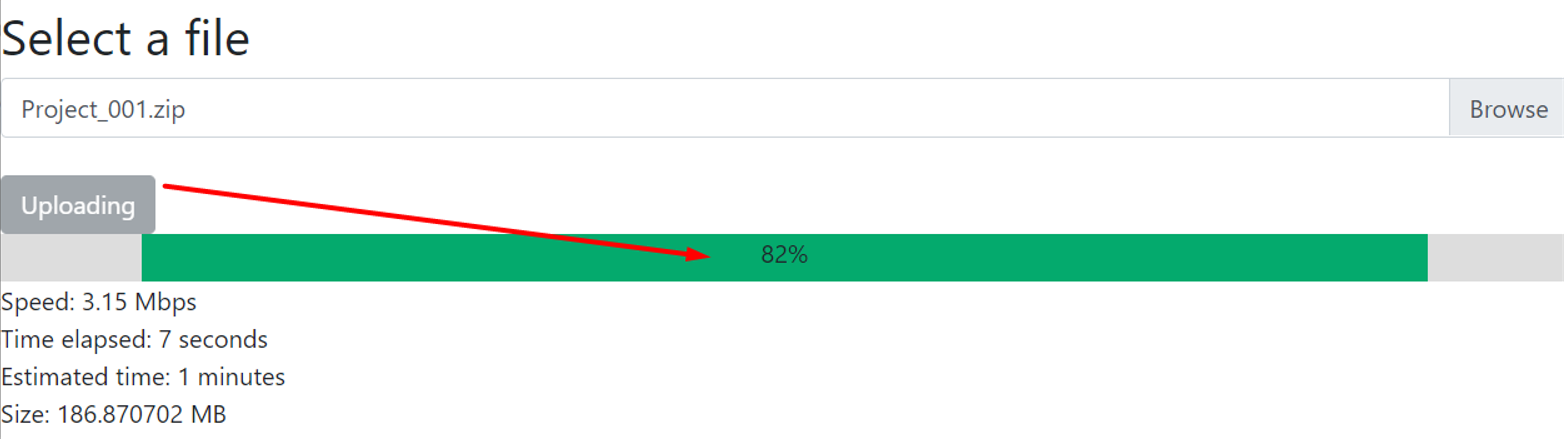
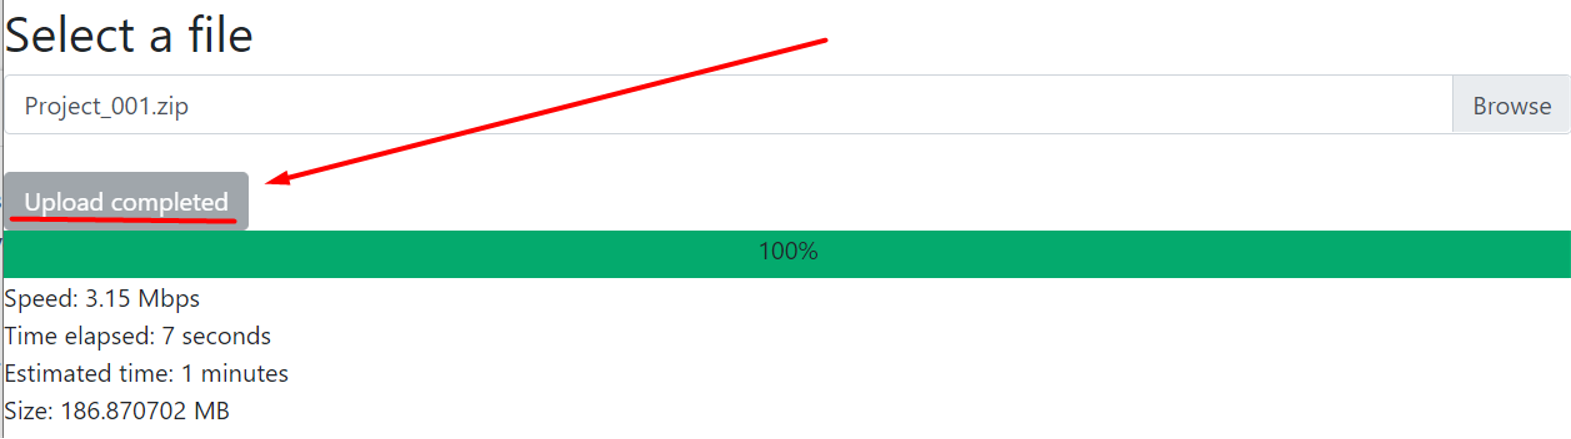
5- Your application has successfully uploaded if the progress bar displays "Upload completed"
| Panel | ||||||
|---|---|---|---|---|---|---|
| ||||||
Back on your Control Panel, refresh the page to see your App on Step 1: Add an App. |
Now you are ready to Upload your Project on Eagle 3D’s Platform !
To set a new Config from your Control Panel, follow this tutorialSelect/Create a Config from your Control Panel
To Play your App, check this tutorial Generate URLs from the Control Panel
Need help? Contact Support
If you still need help, contact support to get your issue resolved quickly.
Submit a new request at E3DS support portal or send an Email at support@eagle3dstreaming.com.
Seek advice. Connect with others. Share your experiences. Join our lively E3DS Community Forum today.